DFU Mode VS. Recovery Mode: All That to Know
These two modes, DFU mode and recovery mode, are frequently used by iPhone/iPad/iPod users to help fix a software problem. You may know a little about them, but do you really know what they are? What's recovery mode and what's DFU mode? When you can use them to fix iOS issues? How to get into/out recovery mode or DFU mode separately? Today, we will explain all aspects of DFU mode vs. recovery mode in this article completely.
Part 1. Recovery Mode - What You Need to Know
In this part, you're going to learn some basic knowledge about iOS recovery mode, including the definition of this term, when will you use it and how to put your iPhone into recovery mode, etc. Here we go.
1.1 What Is Recovery Mode?
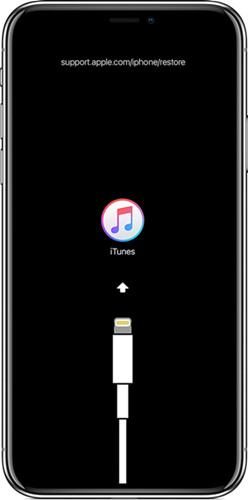
It is commonly referred to as the "second stage loader". This is because the iPhone recovery mode helps you recover your device when it refuses to respond. It starts the phone and puts it in the bootloader mode which is normally called iBoot. During flashing of iPhones with new Operating Systems they are first put into iBoot mode. It responds to USB connections with a computer even when you had initially blocked such connections as numerous iOS restrictions are bypassed in this mode. There are only a few commands that your iPhone will respond to when on this mode.
1.2 When to Use Recovery Mode?
The following scenarios are advisable causes for you to use recovery mode:
• The iPhone screen displays the Apple logo without the inclusion of a progress bar and becomes unresponsive for several minutes.
- • iTunes recognition is hampered on the device or it signals that it is in recovery mode.
- • Your phone displays the connect to iTunes screen.
There are other rare occurrences that call for you to initiate the recovery mode such as:
- • iPhone resetting when you have completely forgotten your passcodes. The device will erase all data and start afresh as a new device.
- • You do not have the passcode to remove the device from the USB restricted mode.
- • A previous jailbreak prevents you from installing an upgrade.
- • You want to clean up the OS after a jailbreak.
1.3 How to Enter/Exit iPhone Recovery Mode
Follow the steps below to enter the recovery mode in your iPhone device:
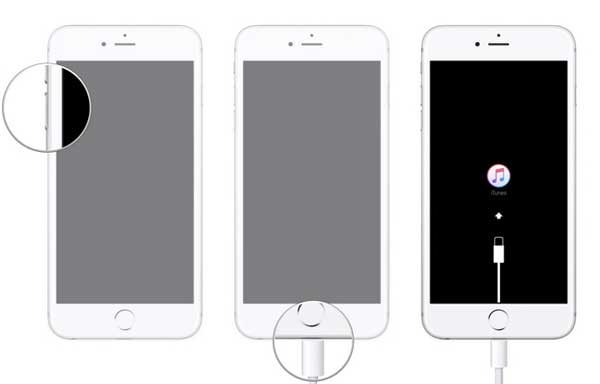
- • For iPhone 6s and earlier versions, the process involves use of the Home button on your device's screen. You should follow these steps:
Step 2: Firmly press without releasing the Home button as well as the Lock button on the side or top of the device.
Step 3: Keep the buttons pressed even after the screen displays the Apple logo and only release them when the recovery mode is displayed.
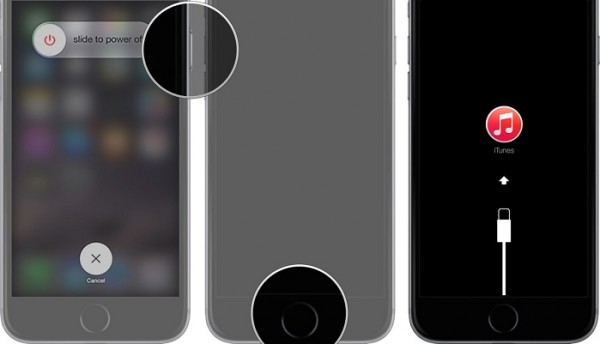
- • For iPhone 7 and 7 Plus their process as they were the first iPhone versions without mechanical Home buttons. You should enter the recovery mode using the following procedure:
Step 2: Simultaneously press the Volume Down and Side buttons without releasing.
Step 3: Press the buttons on after the Apple logo is displayed and release after display recovery mode on the screen.
- • For iPhone 8, X and newer versions, the process of pressing the buttons should be swift in the following manner:
Step 2: Press and release the button for Volume Up.
Step 3: Repeat the pressing for the Volume Down button.
Step 4: Press without releasing the Side button even after the iPhone displays the Apple logo.
Step 5: Release the Side button when the screen display says recovery mode.
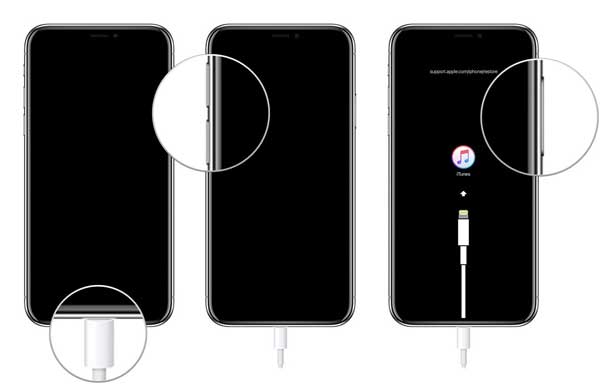
Software update and restore options are available which you can use to fix your iPhone. To exit the recovery mode press the same buttons you pressed to put it into recovery mode until it starts rebooting.
Note: If you think this process is a little bit complicated, you can use Joyoshare UltFix to enter recovery mode in one click for free. All you need to do is to connect your phone to the computer and then launch the Joyoshare UltFix app.
Part 2. DFU Mode - All You Should Know
Similarly, now it's time for us to learn what is DFU mode, when should we use DFU mode and how should we boot our iOS device into DFU mode when needed. Read on to know more.
2.1 What Is DFU Mode?
It basically refers to the Device Firmware Upgrade (DFU) mode where the iBoot bootloader is bypassed and your iOS device connects to iTunes when you need to solve critical software problems. Under iPhone DFU mode your device will display a screen that is entirely black. The mode is normally used to fix issues with your device after jailbreaking.

2.2 When to Use DFU Mode?
Reasons necessitating your iPhone to be put into DFU mode:
- • Firmware upgrade or downgrade.
- • Performing your device when it is tethered after jailbreaking.
2.3 How to Enter/Exit iPhone DFU Mode
The process for putting your iPhone into DFU mode is different depending on the device's version.
- • For the earlier versions (up to iPhone 6S) follow this procedure:
Step 2: With the device turned off hold both the Home and Lock buttons simultaneously for 10 seconds.
Step 3: Release the Lock button but continue pressing the Home button until the iTunes app detects a phone under recovery. The device's screen will, however, remain totally black.

- • For iPhone versions 7 and 7 Plus:
Step 2: Simultaneously press both the Side and Volume Down buttons.
Step 3: With the Volume Down button still pressed stop pressing the Side button.
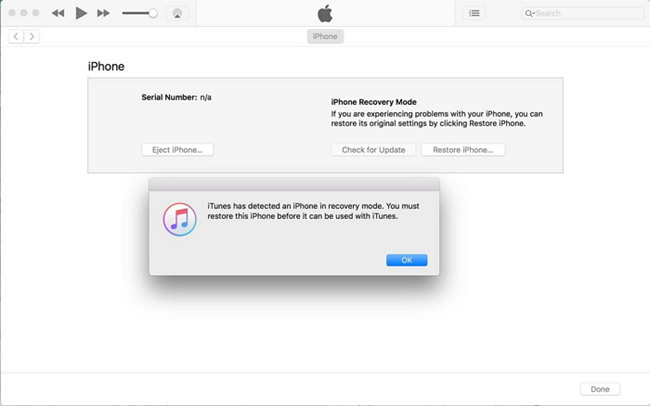
Step 4: The iTunes app you launched on your computer should have recognized a device in recovery mode and the iPhone screen should be dark.
- • For iPhone versions 8 and later on:
Step 2: Swiftly press both Volume buttons starting with the upper one.
Step 3: Press down the Side button until the screen is darkened and press down both the Volume Down and Side buttons.
Step 4: Release the Side button after 5 seconds but keep the Volume Down button pressed.
Step 5: iTunes app will signal you that a device under-recovery has been detected.
The iTunes app will always indicate when the iPhone enters recovery mode. You should note that if your device displays anything on the screen such as the Apple logo or a signal for you to connect to iTunes the process has failed and you should try again. The Apple logo normally indicates that the device is restarting and you pressed the buttons for a long time.
Part 3. Key differences of the DFU Mode vs. Recovery Mode
After reading the basic information about iPhone recovery mode and DFU mode, you must have a brief understanding of these two iOS modes. Generally, the main differences are as follows:
- • The recovery mode uses iBoot while the DFU mode bypasses the bootloader.
- • The recovery mode is for phone restoration using its current software while the DFU mode is needed for a firmware upgrade or downgrade.
- • There are much more difficulties when users want to put iOS device into the DFU mode and many of them have reported that they usually failed to do it.
Part 4. How to Fix iPhone Stuck in Recovery Mode or DFU Mode
Software or hardware issues can make your iPhone get stuck in the recovery mode or DFU mode. You can solve the problem by using any of the following methods:
- • A hard reset in accordance with the pattern applicable for the phone version.
- • Perform a phone recovery using iTunes.
-
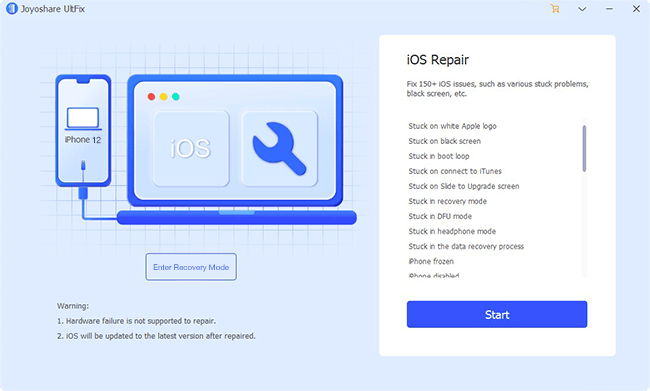
• Use Joyoshare UltFix to fix the phone swiftly and with zero data loss. The process is relatively simple with this program, as you need to connect your iPhone to a computer where the program has been downloaded and installed. You then choose a recovery mode such as Standard Mode and then download a suitable iOS firmware. The repair takes several minutes, and your iPhone's condition remains intact.
- • Visit an apple store for your device to be serviced.
- For more info, you can visit the source page here:
You May Also Like:

Comments
Post a Comment