2 Ways to Back Up iMessages without iCloud
It is important to constantly back up iMessages, but the problem is that iCloud only allows you to back up 5GB of data to iCloud for free. Is there a better way to back up iMessages without iCloud? The answer is "Yes", and here are the best 2 ways to back up iMessages without iCloud.
Part 1. How to Use iTunes to Backup iMessages without iCloud
As a matter of fact, iTunes is a great tool that you can apply to back up iMessages on iPhone/iPad/iPod touch free of charge. It combines "Back Up" and "Restore" options together to better facilitate you. Let's see how it performs.
Step 1: Get iTunes updated to the latest version and simply open it;
Step 2: Connect any of your iOS devices, like iPhone, with a computer;
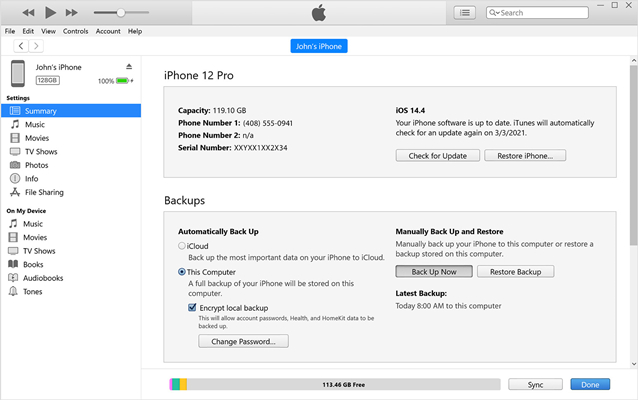
Step 3: Tap on the device symbol and go for "Summary" > "Backups" > "Automatically Back Up"/"Manually Back Up and Restore";
Step 4: Encrypt backup as you wish and click on "Back Up Now" to initiate the backup process.
Note: iTunes will back up the entire iOS data files, iMessages included, to its new backup. Besides, there is no access for you to view what exactly contain in iTunes backup content.
Part 2. How to Use Program to Backup iMessages without iCloud
Except for iTunes backup, you can also take advantage of another professional tool to help you. Here Joyoshare iPhone Data Recovery is a well-liked and all-round software that backs up iMessages safely and independently in a special way. With the aid of it, it's unnecessary to create a backup for the whole iOS data. You have the right to only retrieve and back up iMessages, which saves much storage space at the same time.
What's better, this excellent iMessage backup program also makes it workable to preview iMessages before recovery. In addition, your iMessages backup file can be viewed whenever you want. Any of your previous backups will not be replaced and affected. Sure, it's available to use this program to restore and back up other iOS files to computer, such as photos, videos, notes, reminders, Safari bookmarks, contacts, calendars, call history, etc.
What's better, this excellent iMessage backup program also makes it workable to preview iMessages before recovery. In addition, your iMessages backup file can be viewed whenever you want. Any of your previous backups will not be replaced and affected. Sure, it's available to use this program to restore and back up other iOS files to computer, such as photos, videos, notes, reminders, Safari bookmarks, contacts, calendars, call history, etc.
Key Features of Joyoshare iPhone Data Recovery:
Back up iMessages from any iOS device
Retrieve and back up iMessages selectively or fully
Support recovering and backing up more than 20+ iOS data types
View iMessages before and after backup without time and storage restriction
Retrieve and back up iMessages selectively or fully
Support recovering and backing up more than 20+ iOS data types
View iMessages before and after backup without time and storage restriction
Step 1 Run Joyoshare iPhone Data Recovery
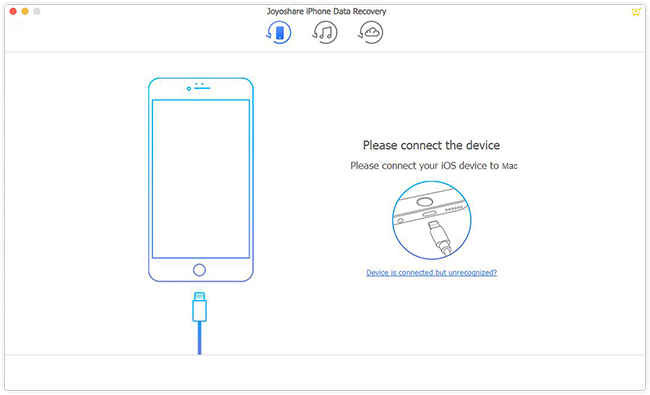
At first, download and install Joyoshare iPhone Data Recovery on your Mac. Then simply get it launched and connect your iOS device to the computer with a USB cable under "Recover from iDevice" mode. Remember to "Trust" computer on your iDevice.
Note: At this step, you can go to "Menu" at the upper right corner and choose "Preferences" to confirm your requirement, which enables you to decide storage location, recovered file format and so on.
Step 2 Select "Messages & Attachments" data type to Scan
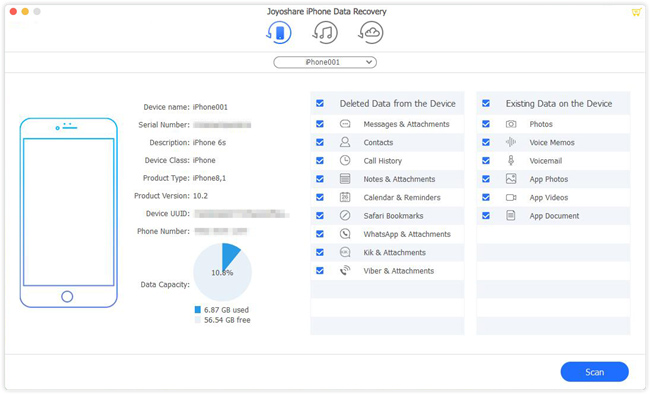
Having successfully detected and recognized your iOS device, Joyoshare iPhone Data Recovery will bring both device info and supported data types for your reference. You can either scan all checked data files by default or only select "Messages & Attachments" to scan with the simple "Scan" button at the right bottom.
Step 3 Preview and back up iMessages selectively
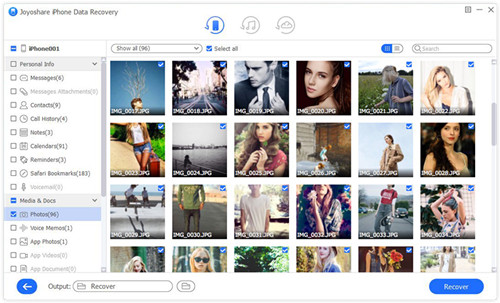
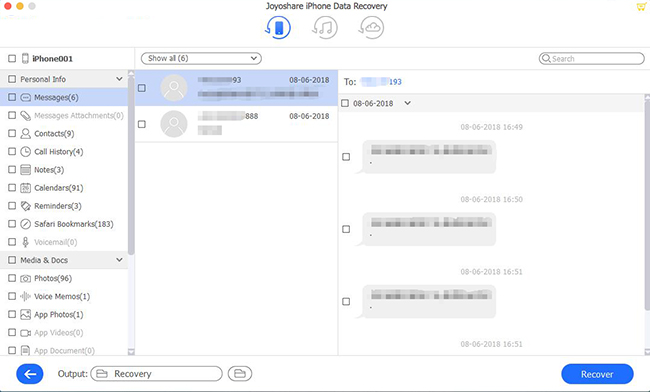
Soon after, Joyoshare will display all recoverable messages and iMessages on the screen for you to choose from. You are allowed to preview these results one by one and get what you need selected after careful check. To press on the "Recover" button, all chosen iMessages will be saved and backed up to your computer's local folder.
For more info, please visit the source page:

Comments
Post a Comment