2 Best Ways to Record Vimeo Videos
As is known to all, Vimeo is a professional video platform offering free video viewing and video sharing services to users. However, it doesn't allow users to download videos at disposal. If you have a desire to download videos from Vimeo but have no clue how to do it, check out this article, which shares a detailed guide on how to download and record Vimeo videos.
1. Simple Way to Download Vimeo Videos
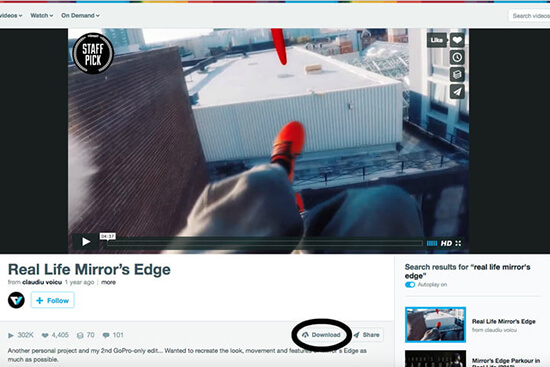
Generally speaking, there is a well-designed download option provided for some videos on various video websites, so does Vimeo. Once you play a video, which is available to download, a "Download" button will be displayed below the video. In this case, simply press it and choose the resolution, like SD, HD, UHD, Original, etc. from the pop-up window in the way you like.

Note: Owing to different browser setup, some users perhaps find it not feasible to directly download Vimeo videos from the description section. Then you should right-click the download link and choose "Save link as" from the drop-down menu, which assists you to decide a storage location for the required video.
Nevertheless, don't be upset when a video is not authorized to download. You can adopt another easy yet surefire solution to get whatever you appreciate. That is recording. Read on to see details.2. Capture Vimeo Videos with Proper Vimeo Video Recorder
To make your video recording professional-looking and high-quality, a trustworthy video recorder is necessary. Here we highly recommend Joyoshare Screen Recorder for you to choose. It is capable of capturing any ongoing desktop video and audio activity on your computer. In addition to grab Vimeo videos, you can also take full advantage of it to make vivid tutorials, record audio from YouTube, capture streaming games, take screencasts, grab online radio, etc. in a flexible way.
Definitely, Joyoshare Screen Recorder has the edge over its opponents in that it comes with abundant recording settings. You can grab either system audio or microphone sound with switchable recording mode, select storage location, preset shortcuts, customize capturing area, schedule recording task, specify configuration info, add cursor effects, etc. Excellently, you are even empowered to skip any unwanted sections, cut captured Vimeo video or take screenshots when the recording is underway.
Definitely, Joyoshare Screen Recorder has the edge over its opponents in that it comes with abundant recording settings. You can grab either system audio or microphone sound with switchable recording mode, select storage location, preset shortcuts, customize capturing area, schedule recording task, specify configuration info, add cursor effects, etc. Excellently, you are even empowered to skip any unwanted sections, cut captured Vimeo video or take screenshots when the recording is underway.
Key Features of Joyoshare Screen Recorder:
Grab Vimeo video and audio simultaneously
Come with well-arranged task scheduler
Have ability to record screen on Mac and Windows
Support a wide range of output formats and mobile devices
Allow you to capture video in personalized size or systematic ratio

Step 1 Launch Joyoshare Screen Recorder
As long as you have already equipped your computer with Joyoshare Screen Recorder, you can straightly run it on the desktop screen. Afterwards, navigate to the right "REC" part and switch recording mode to video recording status.

Step 2 Setup recording options
Before you capture Vimeo video, you ought to do lots of preparation work. Specifically, go ahead to "Capture Area" to personalize a recording region. Then you should confirm whether to grab system audio and microphone sound at the same time. Alternatively, decide your storage location and output format for destination video. If you desire to adjust related parameters, such as resolution, bit rate, codec, etc., do it in this step. Some features like shortcuts, recording time, cursor effects, etc. can be set as well as per your needs.

Step 3 Start to record Vimeo video
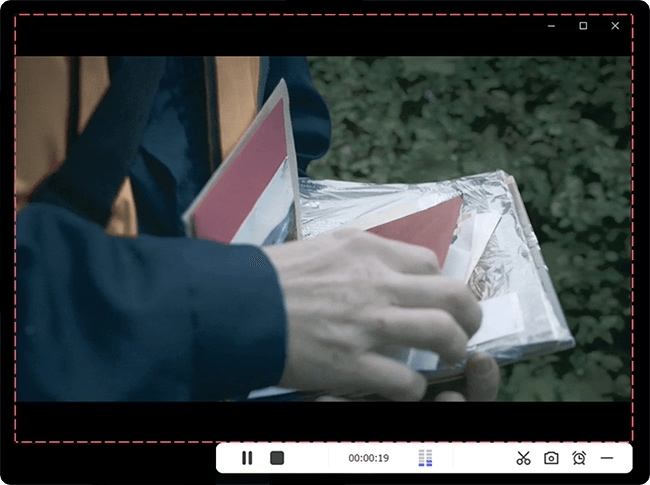
It's time to open the designated video in Vimeo and click the red "REC" button in Joyoshare to initiate a new recording assignment. If the capturing area that you set in previous time is not satisfying, re-adjust it during the 3 seconds countdown. Hereafter, Joyoshare Screen Recorder will get down to capturing Vimeo video. When it is in progress, you have the chance to cut recording by clicking the "scissors" icon, skip needless parts by hitting the "Pause" button and take snapshots by utilizing shortcut.

Step 4 Export Vimeo video
No sooner than the video recording comes to end, a "History" window will pop up, from which you can preview captured files one by one, deleted useless one, revise video name, or tap on "Search" icon to browse local results.

For more info, please visit the source page:
You May Also Like:

Comments
Post a Comment