How to Use VLC to Extract Audio from Video
As a versatile media player, VLC can do more than just playing videos and audio. For example, it can help users to cut video clips, rotate a video, etc. If you search what are some amazing features of VLC on the Internet, you’ll get more than you can image. In this article, we will show you how to exact audio from video with VLC media player.
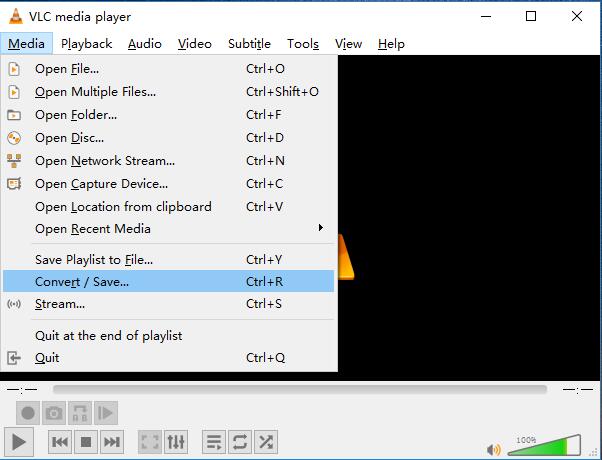
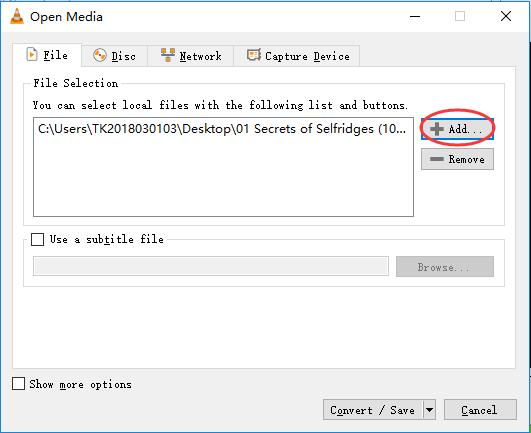
Step 1 Add target video file

First, launch VLC Media Player on the desktop. Go to the "Media" > "Convert / Save" to activate the Open Media window. Now click the "Add" button to find and import the video file you’d like to extract audio from.

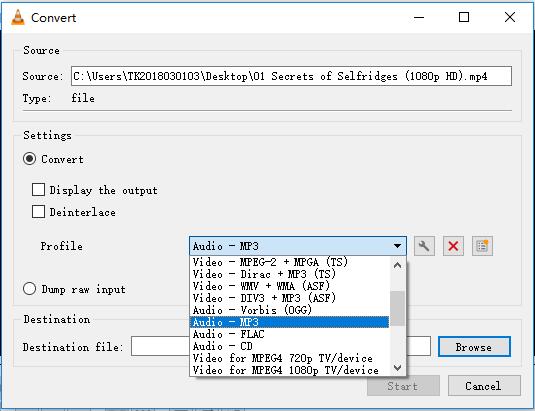
Step 2 Choose an output format

Next click the "Convert / Save" button on the lower right corner. In the new popup window, choose the "Audio - MP3" option in the drop down menu of Profile as the output format. You can also change the destination file location by clicking the "Browse" icon and rename the file, or it will overwrite the original video file.
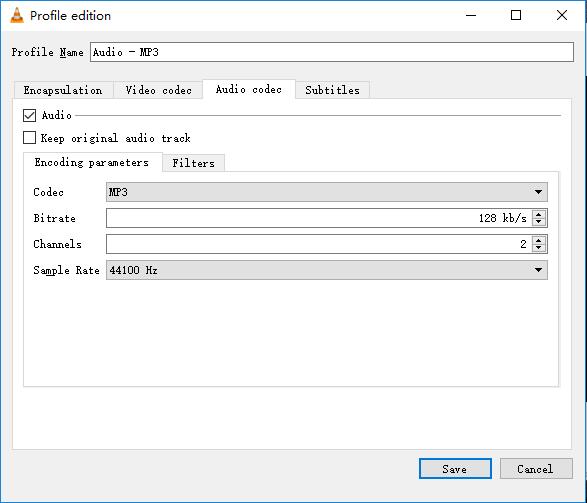
Step 3 Edit output file (optional)

Press the Settings icon to edit selected profile such as change the codec, bit rate, channels, sample rate under the "Audio codec" option if needed.
Step 4 Start to extract audio from video
After all settings are ready, click the "Start" button to let VLC begin to convert video file to audio. Wait a few seconds and then you will find an MP3 file will successfully appear in your destination folder.
Note: You can also use this professional audio extracting tool - Joyoshare Media Cutter to extract audio from video files easily if you're not happy with VLC media player.


Comments
Post a Comment